How to Resize and Enlarge an Image without Losing Quality?
Have you ever tried to resize an image and ended up with unsatisfactory quality? When you enlarge the image, it becomes blurry and unprofessional. A picture is made up of thousands of pixels. When you enlarge it, the pixels become visible resulting in poor quality.
Do you want to know how to resize an image without losing quality? You are at the right place. It does not matter if you need a high-quality image for your blog, social media, or as a backdrop for your video; getting the right ratio is essential.

In this article, we will show how to enlarge an image without losing quality with a simple process.
Fantastic Image Formats and Where to Find Them
When it comes to picture format, there is no shortage of options. There are different formats that you can use according to your purpose. However, you can also change the format for image optimization for SEO.
There are some common image formats that user may need to remember:
JPG
It is the most common image format you will see on the internet. It is considered the “Swiss Army knife” of online images because it is usable in web-based projects and documents. The only drawback of this format is that its image quality also decreases with file size.
TIFF
This format is usually used for printing photographs. The TIFF can be transferred online with any visible image quality loss, but you should avoid using raw files online as they can dramatically reduce your load time.
PNG
It is another common witnessed format. The PNG files allow the editor to edit the image without notable quality loss. It is best reserved for text-based content, for instance, charts and infographics.
PSD
If you receive the file in OSD format, the editor uses Adobe Photoshop. When you have to have Photoshop to open the file because the file was produced utilizing multiple layers that need to be edited individually.
GIF
Contrary to contemporary belief, a GIF is not a short video. The option to choose colors in GIF is limited compared to other files. It offers an advantage in speed but loses the picture quality.
Why Does Resizing in Image Make It Lose Quality?
A top-notch quality picture on the internet is supposed to serve two primary purposes. It displays professionalism and minimizes the page’s load time.
However, maintaining a balance between both aspects is tricky. The high-resolution picture will look better but will take more time to load. Anyhow, both situations, such as blurry pictures or slow loading, can destroy the picture quality.
Generally, you should aim for a 100 KB picture size. It will offer you a good balance of size and quality. Any flaw in both will not be visible to the site visitors. It is an ideal number, but what happens if you have an image ten times bigger than the size?
In this case, you are likely to scale it down, but when you do that, it will also decrease the number of pixels. As you eliminate pixels while decreasing the size, you may not witness a visibly negative impact on the quality.
That is why it is a good idea to focus on how to enlarge an image without losing quality. Moreover, make sure to keep an original copy of the enlarged image, so if you ever need to modify it further, you can do it easily.
How to Resize an Image Without Losing Quality
If you plan to modify and manipulate photos, you should invest in premium tools such as DepositPhotos.
Use an Online Tool
Here are the 5 best image enhancer tools if you are searching for how to resize an image without losing pare.
1. Depositphotos Free UpScaler
Want to know how to enlarge an image without losing quality? https://depositphotos.com/upscaler.html is your answer. It can effectively upscale the images without hindering pixels. It is a free tool that you can use to enlarge images for eCommerce, Print, and other creative projects.

Key Features
2. GIMP
It is an open-source alternative to Photoshop. This well-known photo manipulation software you need to download on a PC. It is limitless software when it comes to features. It has many useful features apart from ordinary image enlargers too.

Key Features
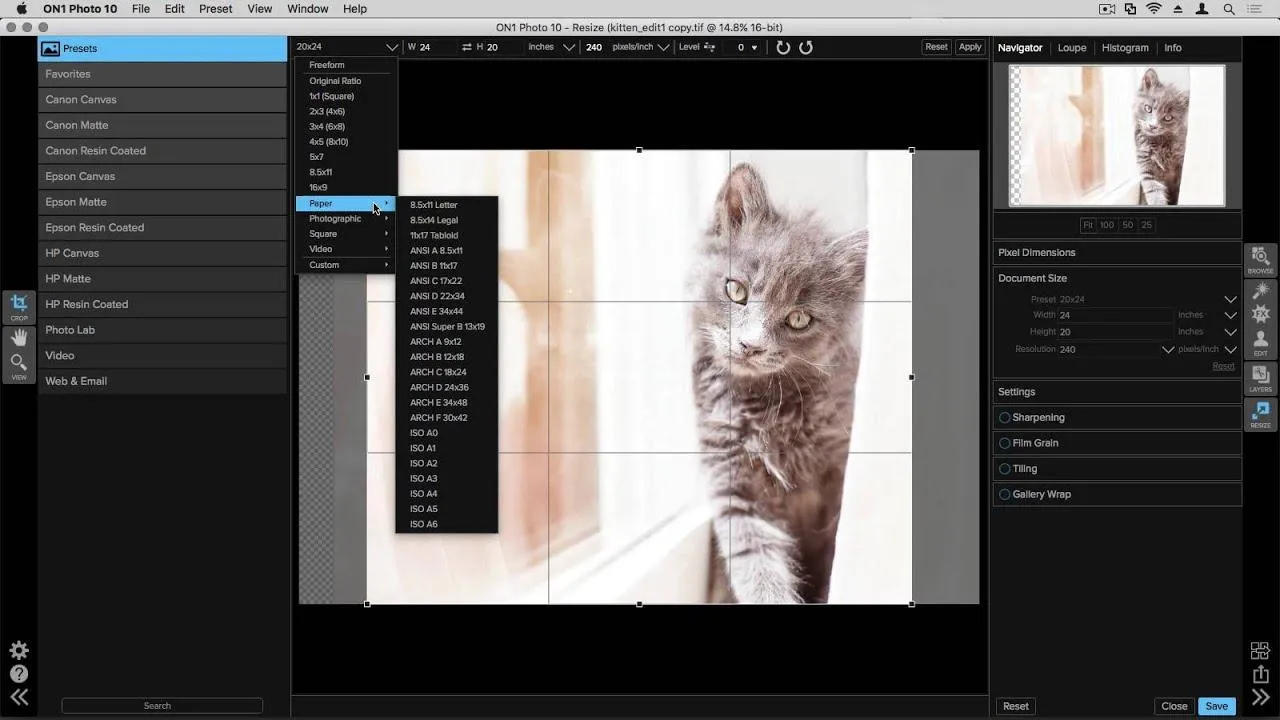
3. ON1 Resize
It is a well-known and premium desktop AI image upscale tool. ON1 resize is packed with multiple useful features for increasing an image’s size, generating printable graphics, and manipulating what an image looks like upon printing.

Key Features
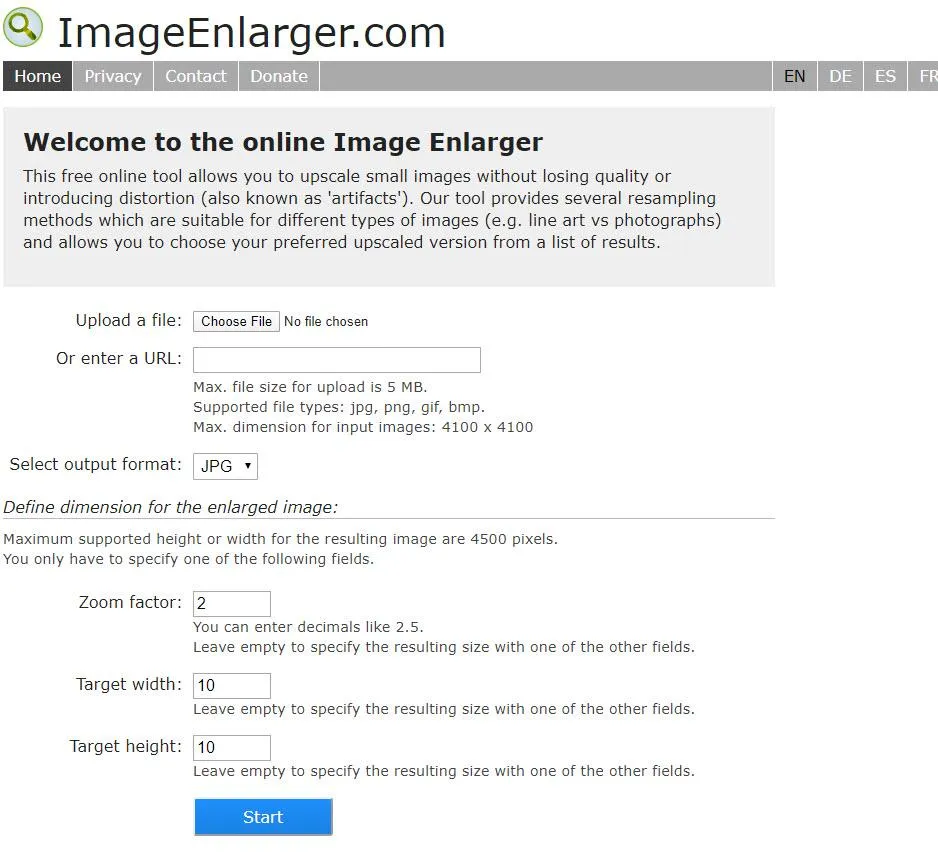
4. Image Enlarger
It is a valuable image enlarger tool that boasts the simplest interface. If you want to know how to resize an image without losing quality, this is the simplest answer. No other photo editor can beat the convenience of the process. Upload the image, select the format and the desired dimensions, and you are done.

Key Features
5. Befunky
It is a valuable tool for people who have a shortage of space. Befunky is an online image editor and resizer with many options for adding effects and resizing. It also offers distinct creative textures and transforms normal images into creative art pieces.
This online image enlarger tool is packed with hundreds of photo editing features to give a worthy answer on how to increase image size without losing quality.

Key Features
Use a Plugin
While showing how to enlarge an image without losing quality, it is impossible not to come across plugins. Plugins to the website allow users to resize images automatically while placing them on the website.
For instance, WordPress has two main plugins: Imagify and Smush. Both are free to install and use with certain limitations. However, if your plugin utilizes the lazy load feature, the image will not load until the user scrolls.
Resize an Image in Four Steps
Learning how to resize an image without losing quality is not as difficult as it sounds. Follow these four simple steps for image optimization for SEO.
Step 1: Upload Your Image
Most tools allow you to upload images by drag and drop option. However, you can also upload the image directly from the desktop, but make sure you are selecting the right size.
Step 2: Determine the Format
Select one output format of a picture, such as PNG or JPG. If you do not know which file you want, you can consider the purpose for a better decision.
Step 3: Download and Compress
Once you have resized the picture, press the save button and download it to your desktop. Check if the picture now fat an acceptable limit. You can compress the file to fit within the required limit if the file is large.
Step 4: Upload and Test
Finally, upload the picture to the platform of your choice and check how it looks. If it does not look professional, it may require further change. Do it and again upload it.
Frequently Asked Questions
Can I Enlarge a Picture for Print Without Losing Quality?
It is claimed that enlarging images requires technical knowledge, but it depends on the software you use.
Depositphotos does this by saving the details, but you also utilize the native preview function on your device while opening the image. Adjust the size under the tool and uncheck the resample image box beneath. It will allow you to resize before exploring new dimensions.
How Do I Resize Images in Bulk Without Losing Quality?
You will require a free tool if you want to resize bulk images simultaneously. For instance, Depositphotos offers such services. All you need to do is select all images, add them to the platform, select the size, and download them again.
What’s the Difference Between Resizing Images and Scaling Images?
When you use the dimension of the image, just enlarge it; it is known as scaling the image. On the other hand, Resizing the image means that you are modifying the proportions of the image’s size. For example, if the original image were 4:3, enlarging it by following 16:9 would make it appear different.
Final Thoughts
Learning how to enlarge an image without losing quality is not so difficult. However, it may take you some time to be proficient at it. Many professional photo editors will tell you that editing is nothing less than science.
So, do not be discouraged if you fail several attempts. Take advantage of Depositphotos software that will make your life easier.
